
ARTICLE: HOW TO SETUP A TURNTABLE
19 January 2022
FUNDAMENTALS
Record players are arguably the most temperamental of hi-fi components. Even the best are easily upset by inconsiderate positioning, poor adjustment, or inadequate support. Get everything right, though, and they can shine in a way that will make you wonder why we ever bothered with digital. Most budget turntables come pre-assembled – entry-level options require little more than plugging in to the wall socket and pairing to your Bluetooth headphones. Even if there's a little more to be done than that (and no Bluetooth onboard) affordable decks almost always come with the arm and cartridge attached and adjusted. So you should be good to go.


The first thing to get right is not the turntable, but the support it sits on. This has to be absolutely level – any deviation will affect how well your record player works. The support should also be rigid and well-controlled in terms of internal resonances. Some decks respond well when placed on heavy supports, others prefer lighter alternatives. Much of this depends on the structural behavior of the deck itself and can only be decided by experiment. The issue of leveling doesn’t stop there. If your record player has adjustable feet, make sure it sits flat and, if it has suspension, ensure the platter is level too. It all sounds obvious, but making sure everything sits level is vital – you’ll never be able to optimize the performance of your deck if this aspect isn’t right, no matter how well the rest of the adjustments are done.
TONEARM AND CARTRIDGES
Most turntables come pre-fitted with a tonearm. If you want to change that or have bought a more esoteric deck that comes without an arm, you’ll need an appropriate armboard. Turntable manufacturers should be able to supply a range of artboard options, which should suit just about any tonearm out there. In the worst case, it isn’t too difficult to machine one to fit. There are a number of adjustments on the tonearm. Its height has to be set so the arm is parallel to the record’s surface when the cartridge sits in the groove. It’s possible to fine-tune performance by altering this so the arm bearing is a little higher or lower. This alters the angle at which the stylus tip meets the groove – but we’d start with its level.
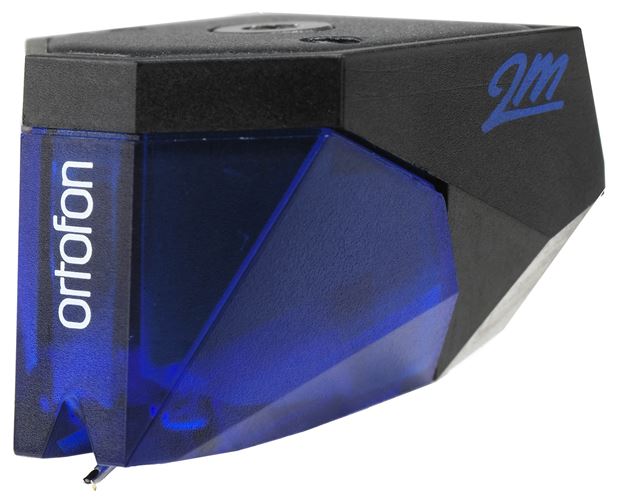

Then there’s the tracking weight, which is adjusted by moving a counter-weight at the rear of the tonearm. The down-force should be set according to the cartridge manufacturer’s recommendation, to start with at least. If the tracking weight is set too high, the sound becomes dull and ponderous. Too low and the presentation turns thin and the cartridge won’t track the groove properly. The last adjustment on the tonearm is that of bias. Bias is a sideways force on the cartridge to balance out the inward pull of the record groove. The bias is usually set to the same amount as the tracking weight. As with the tracking weight, don’t be afraid of playing around with the bias setting – small changes can make a notable difference. Most cartridges are mounted on the arm with a couple of bolts. That’s easy enough to do if a touch fiddly. It’s trickier to align it accurately so that the stylus tip sits perfectly in line in the record groove.
Back